Hay Making by Hand
Written by deanom
I am not an expert at hay making, but I have been asked to write an article about it, as some of you may be struggling for hay this year. If there are people with more experience of this than me, please feel free to contribute your ideas, and to correct anything that you believe to be incorrect.
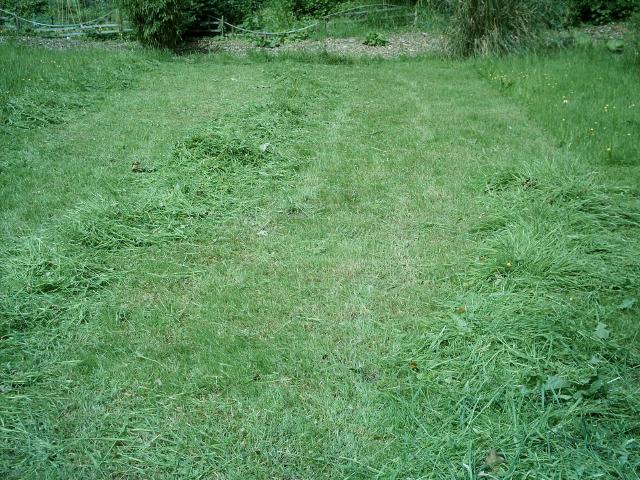
This is my third year of mowing by hand. In 2005 I experimented with haymaking. I didnt have any animals, so was just trying to discover what worked. In 2006 I cut about an acre of hay by hand, injured my elbow, and had the rest cut and baled. This year, I still have bales left, so I am just mowing, not haymaking. I mow about 3 ½ acres, some of which I keep for hay, but the rest is just stacked in piles to decompose naturally. This is mown throughout the summer, mowing for between 2 4 hours a day.
Advantages
This year has highlighted some of the advantages of using a scythe. With the amount of rain that fell in June and July, even when the rain stopped, it took a while before the ground was capable of supporting machines. Cutting by hand allows you to get onto the land much quicker, and make hay with a much smaller window of good weather. This is particularly important if you have a small area of grass to cut, and rely on somebody else to come in and do the job. They will cut their own, and the larger fields first. The scythe also allows you to take hay from the smaller areas, orchards, lawns, hedgerows, verges etc. which would be uneconomical or difficult to cut by machine. The cutting is however much slower, unless there is more than one mower.
Handling
The key to hay making by hand is not the mowing, or the drying, but in the handling of the finished product. In particular the movement of it, and how you store it, and I would like to discuss this first.
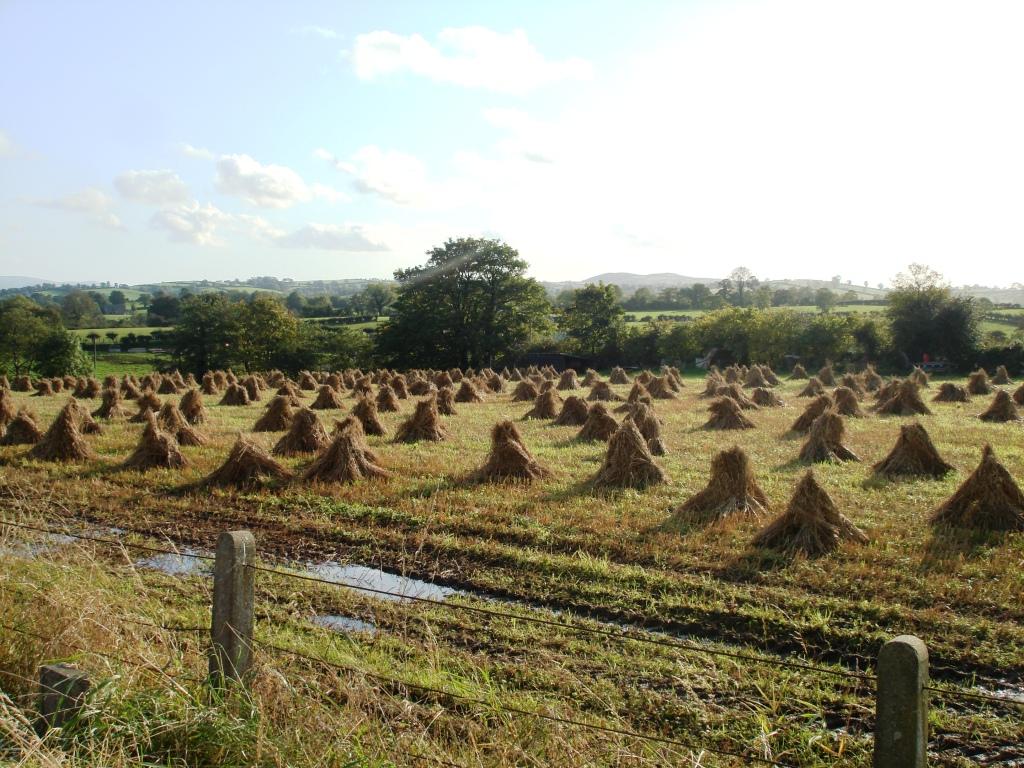
If you think back to the way that loose hay used to be handled, it will give you some idea of what you need to do now. The finished hay was stacked onto a cart in large piles. It was held in place by ropes which were pinned into the hay itself with long pins (the original needles in a haystack). It was taken into the barn where it was thrown (pitched) onto a raised floor with a fork (a pitchfork), then trampled down. When hay was needed, a long knife was used to take a slice off, which was then either thrown down to the animals wintering in that building, or taken to the animals. This system applied to the larger farms and estates, and it would need a historian to say how much of this would apply to a farm worker, or peasant farmer, but some basic ideas can be drawn from it.
Movement
A quick thought about which areas that you conserve for hay, where you overwinter your stock, and what buildings you have available, or need to construct, could save you work. If you overwinter stock in buildings, then putting your hay there makes sense. That way it is only moved once, from the field into the building and then fed directly. Stored overhead, it will also add an element of insulation. If your animals are kept outside during the colder weather, is there a suitable building near there that could be used, or is there another suitable area that already has a building which could be used for the stock? Could you change the way that you graze your stock so that the fields that are kept for hay are the ones closest to where it will be stored? Much of this is common sense, but perhaps this is a good time to look at how you work now, and see if you could make things easier for yourself.
As for the carriage of the hay, there are a number of simple ways of getting loose hay from A to B, the most suitable being dependent on your own circumstances. If you have some machinery (tractor/compact tractor/ ride on mower), you could put the hay onto a trailer and tow it. A cart drawn by a pony, or harness goat would also do the job. Were talking about a volume problem, as opposed to a weight problem. The hay is fairly light, but takes up a lot of space. Here, were only moving the stuff about 100m, so we simply stuff the finished hay into the big bags that you get sand and gravel delivered in, then two of us drag it into the shed. Crude, but effective.
gil says : I use a wheelbarrow, with a fork stuck through the hay to hold it down. Takes ages, but if you've nothing else available, it works.
Storage
For those of you without a suitable upper storey to use, you will need to make some form of racking. A simple solution is to acquire some of the metal security panels that they use around building sites. These can be supported in pairs to form a V shape, or in threes to create a U shape. A similar rack could be built quickly, and cheaply, using timber and weldmesh. You will need to leave a gap underneath to allow some airflow. It would make sense to ensure that there is enough room for a cat to get under (rodents) and perhaps for you to crawl through. Please note that these are just suggestions. Last year we simply stacked our bales into a box shape, and filled the space inside with loose hay. It worked. It should also be possible to make a rack that your animals could feed from directly, saving more labour.
A word of caution. If hay is stored too damp it can catch fire, or go mouldy. I have no experience of this, but Im sure there is plenty of advice on this in the forums.
Haymaking
The making of the hay is not too difficult. It requires a scythe, a rake, and a pitchfork. It will take two to three days of dry weather to deal with about ½ an acre of hay, with an extra day for each additional ½ acre. This figure is only approximate, and will depend on your proficiency with the scythe, the time of year, the weather, and the consistency of the meadow that you are mowing. To give you some idea of what area of grass you will need to cut, last year I probably only used the hay from ¼ of an acre for my six ewes. A harder winter will need more hay, as will more stock.
Mowing is easiest at dawn, getting progressively harder through the day as the internal moisture in the grass decreases. So a sensible routine for haymaking would be as follows :
Night 0
The night before mowing, sharpen your blade, and a spare if you have one.
Day 1
On day one start mowing at first light, and continue until about eight. Have breakfast, peen your blade, or change blades then continue until lunch. The grass is left in rows after mowing. I leave these rows until I have finished mowing. This allows the ground between the windrows to dry out a bit. I spread the grass with a pitchfork, trying to fluff it up as much as possible. The aim is to get as much air through it as possible. If you have one or more helpers, they can do this for you. Whilst they could follow behind you whilst youre mowing, I prefer to wait until after 11 am. Once the grass has been shaken out, you can get on with something else for a couple of hours, not forgetting to peen your blade(s) for the following day. If youre a glutton for punishment, or you have no other choice, you could mow right through the day. Personally, Ive had enough by then, and it takes a lot of effort to sustain that level of work for a number of days. Late afternoon I turn the grass again. Im not sure that this is necessary, but its worked for me, so Ill continue to do it. Just before dark, I rake the grass back into rows. This is to reduce the surface area of grass that will become wet with dew overnight.
Day 2
Day two is a repeat of day one, with the following additional tasks. Once the dew has dried, normally by 11 am, I shake out the grass that was cut on day one. With helpers, that can be done whilst you are mowing. If Im alone, I wait until Ive finished mowing, shake out the grass from day one, then shake out the grass from day two. In the evening, the day one grass is raked into a row, and then into heaps, further reducing the exposed surfaces.
Day 3
Day three repeats day two except that the first batch of grass should be ready to put into the rack by the end of the afternoon. In fact the grass gets another day to cure in the rack before the grass from day two is piled on top of it. To judge if the hay was ready, in the early afternoon I twist it to make sure that no moisture comes out of it, and then leave it until later that day to be on the safe side. When it is cured, it does develop that typical hay smell. It may not sound very scientific, but the smell is different from when the grass is first cut. You can keep this routine going for as long as the weather remains suitable.
Variations and coping with the weather
The system that I have described works for me, but you may need to adapt it to suit your own circumstances. The key is flexibility, and the thing most likely to affect you is the weather. Ideally what is needed is a spell of warm dry weather, which lasts long enough to get everything done. It doesnt have to be bright sunshine, just dry. Wind helps. That doesnt always happen so you need to make adjustments. Firstly, if you are not going to get a prolonged spell of dry weather, you can still make hay in small bites. A two day spell would allow you to mow for one day, and then stack loosely in the rack at the end of day two. By the time that your next batch of hay was cut and ready for stacking, the first batch will have finished curing. If youre not confident that it is dry enough, just shake it out of the rack when the weather is suitable.
If you are making hay and the forecasters predict the possibility of overnight showers, mound the hay up into large piles, so that only the outside layer gets wet, and then shake it out again to dry off. The books say to comb the outside layer to help the rain to run off, but Ive never managed to get that to work. Ive been told that the hay takes less damage from rain when it is first cut, than once it has dried and then gets wet again. Therefore if your dry spell is sandwiched between days where there is the possibility of a shower : start to mow on the day before the dry spell, and accept that it might get a bit damp.
In some countries they use frames, fences, trees etc. and hang the grass on them to increase the airflow, and therefore speed up the drying. This might be an option for people with smaller areas of grass to cut.

Grass is easier to mow earlier in the year than later. So it will save a lot of effort if you start hay making earlier, whenever there is a suitable window of weather. If you leave it until later, you may not get another chance until the grass has grown too long, and fallen over, when it will take far more effort to cut. In some alpine areas they take a number of cuts from the same meadow, cutting the grass whilst it is much shorter. This would take far less effort than a single cut, the grass should dry more quickly, and would help to prevent the loss of a whole crop of hay if the weather changed suddenly.
Experiment
Even if youve already got your hay in, why not give this a try? There is normally a late flush of growth in September/October, and if theres a dry spell during this period, why not take a small second cut and see how you get on. If you do, why not see which hay your stock prefers? For those of you with ruined, or poor quality hay, perhaps this would give you a small supply of better hay to supplement what youve got put by.
I hope that this article will encourage some of you to try making hay by hand. Good Luck