Really Easy Triangular Shawl
Written by sally_in_wales
A few of you have asked me at Downsizer meetings for the 'pattern' for the various handspun shawls I usually have with me.
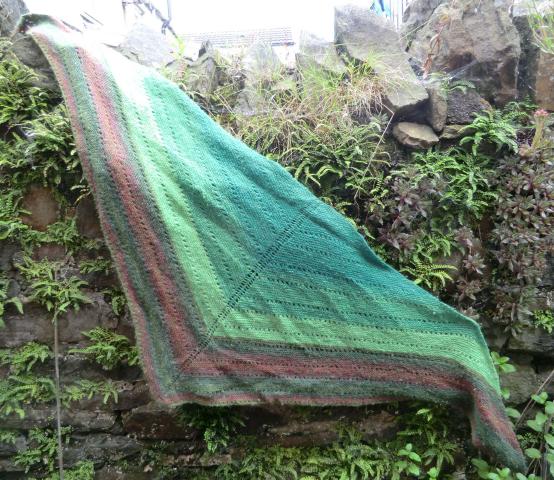
Its not so much a pattern as a general formula, and it is incredibly easy. It adapts well to any weight of yarn or size of needles, and as it grows from the back of the neck downwards, its easy to make it whatever size you like. This one is based on garter stitch (knitting all the time, no purl stitches), and uses yarn overs to increase and make decorative holes at the same time.
Choosing yarn and needles: Aim for needles that give a slightly loose knit, but without being too 'holey'. If you are happy with the fabric as you create it, you've got the mix right, if not, adjust needle size until you like the drape, and it will all work fine. As an idea, for dk yarn, try a 4.5mm needle, for Aran, try a 6mm. See if you like the effect.
The 'Pattern'
Its a 2 row formula. You start with 5 stitches, cast on however you like best. This will become the back of the neck, and will grow out in a triangular shape, getting slightly larger each row.
Row one: K1, yo, (k), yo, k1, yo, (k,) yo, k1
Row 2: knit
Lets have a good look at what we are doing here. Its structured as edge, (plain knitting), middle, (plain knitting), edge. The only thing that changes each time is the amount of stitches in the plain knitting bit.
You start with a knit stitch at the edge of the shawl, then you increase one using a yarn over (if you prefer a different increase, try that instead!). That deals with the edge.
The next (k), is one knit stitch on the first row, but the number will increase every time as the shawl gets bigger. All you have to do, is knit until you are right next to the centre stitch. If it helps, pop a couple of stitch markers on your needle on either side of the centre stitch until you can see what is happening. In practice, after a couple of rows, you'll be able to spot the centre by the row of 'holes' where the yarn overs are, and won't need any markers or a pattern at all.
The centre, (in bold above), is make a yarn over, then knit the centre stitch, then another yarn over.
Now we have another section of plain knitting (one stitch in the first row).
Then an edge again, make a yarn over, then a knit stitch to finish.
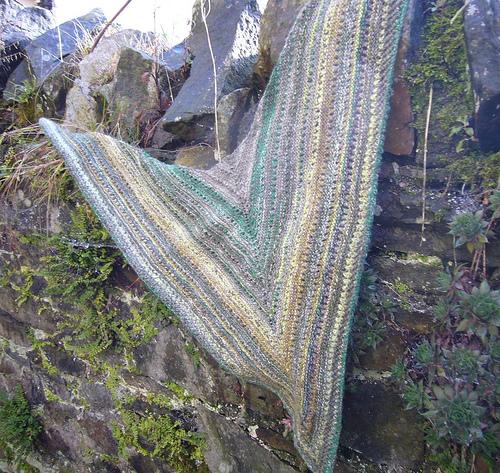
Your second row is just plain knitting, unless you want a shawl shaped like the one below. This more arrow shaped effect is achieved by working Row one every time, without a plain row in between.
Having cast on 5 and worked the first pair of rows, you will now have 9 stitches on your needle, so the formula for row three will read: k, yo, (k3), yo, k, yo, (k3), yo, k;
and for row five: k, yo, (k5), yo, k, yo, (k5), yo, k.
Those numbers in brackets(your plain section), will go up by two each time, and your shawl will steadily grow.
Thats about it! My versions have occasional rows of extra holes for a bit of decoration, but they are entirely optional. If you fancy those, all you do, is on a plain row, work: yo, k2tog, right across the row. You may have to fudge slightly if doing the arrow shaped version, because you will not be increasing on that row, but as long as the rows of decorative holes are well spaced out, it doesn't seem to make a difference. Stripes in different yarns look good as well.
When you have made your shawl as large as you like, cast off loosely, and most knitted items look better if you gently wash them, blot them dry in a towel, then pin them out flat to dry (this is called blocking if you aren't familiar with it). Doing this really helps to perfect the shape and texture of your work.
Enjoy your shawl!
|

