A darn too far:quilts made from old jeans
Written by Cathryn
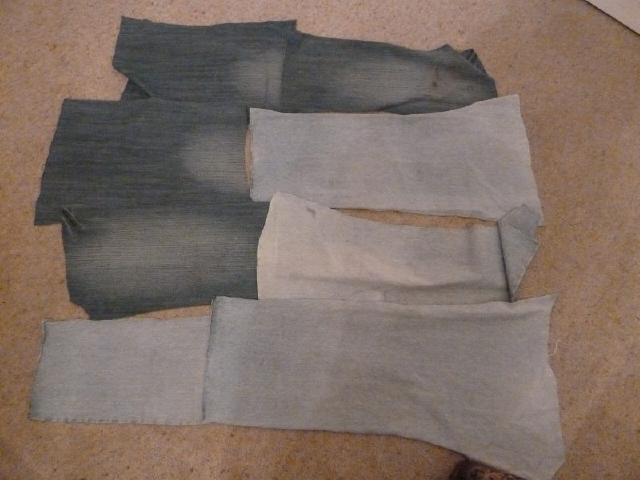
Take some pairs of jeans.
The number depends on how ripped they are and how big you want the competed quilt to be.

Cut them up into big pieces, removing all the seams (and most of the stains and holes).
The seams can be rolled and glued into quite heat resistant mats.

I have chosen to cut the jeans into rectangular strips and used as much of the fabric as possible.
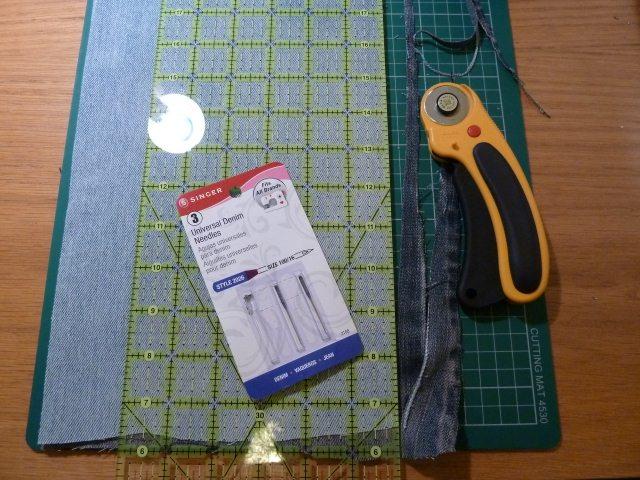
I've used a rotary cutter but scissors would work just as well. The sewing machine needle is designed to sew denim. I don't think this is absolutely necessary but as I am making quite a few of these quilts and like working with denim, it was worth buying a pack.
Keep cutting out rectangles of equal width but lay them out before you cut the lengths. The denim is all different colours and it's best to see how they work together before you sew them up. You also want to avoid too many seams meeting in one place otherwise it becomes far too thick to sew through.

Sew together in strips and then sew the strips together using 1/4 inch seams. Press the seams open (denim is a bit chunky to press in one direction).

Decorate, this part's completely up to you.

Then you need to attach the backing. I've used a heavy cotton throw for one of them and a piece of clydella from my Mum's stash for the other. Neither of them needed any extra layer but you could use a cotton back and cotton batting. If so, you will need to lay out the different layers and pin them together before quilting them altogether. There are a lot of online tutorials that can help you with this.
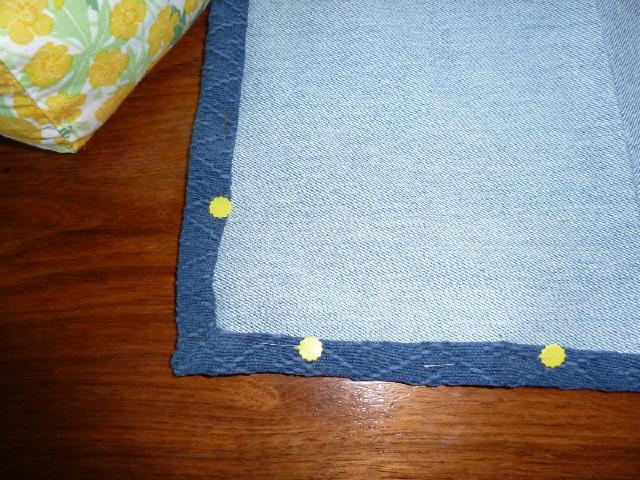
Cut out the back a little larger than the front. Put the wrong sides together and turn the back edge over the front and pin down. Pin all the way around and then sew up. I machine sewed the edges, with a double row on one of them but you can hem by hand if you wish. Tuck the corners in neatly, you might need to cut the corner of the bottom fabric off in order to do this. I finish the bottom edge a little wider than the top but that bit's up to you.

The walking foot on the sewing machine isn't necessary but use it if you have it. It helps keep everything smoother.
I have attached the front and back of the quilts together by randomly sewing a swirl on one of them and by sewing over some of the animal prints on the other. It's not absolutely necessary if you use a heavy weight backing but I want to be able to easily wash these quilts in the machine. Stitching them together will help them hold their shape.

Be warned, the animal prints take forever and require a lot of discussion before stitching down in absolutely the right position.
|

