Making Felt Boots
Written by Frewen
This article assumes that you have basic felt-making knowledge (if you don't, there are several tutorials to be found on the internet, or ask on the forum).
You will need:
Old towel
A matchstick blind
Sheet of bubble wrap
Olive oil or glycerine soap
An old conditioner bottle with half a dozen holes poked in the lid
Plastic dustsheet
A piece of foam laminate flooring underlay (if you don't have any underlay you could use bubble wrap or a piece of PVC. Don't use calico or cardboard as these boots will be going into the washing machine; calico will felt into the boot and cardboard will turn to mush).
Picking your wool
Select something hardwearing, I have used Alpine, Zwartble and Hebridean wool in the past. You could use Merino, but be aware that it is a very soft fleece and will wear through sooner than the coarser wools mentioned above. Roving, top, sliver, batt or hand-carded anything that you can lay out evenly will be fine.
Amount: 10 oz (300g) will be sufficient for all wool types and most foot sizes. For a woman's size six in coarse wool, I use about 8 oz of fibre.
Making a template
Draw around your foot - it doesn't matter which one because you are going to "round it out" a bit from the outline of your foot: about 2 inches / 5 cm around the sides, and a little bit further around the toes.
Once you have rounded the foot shape out, start the leg extension about half way up from the toe. The other edge of the leg extends similarly from the heel. Smooth and round the edges, making a rather elongated U shape.
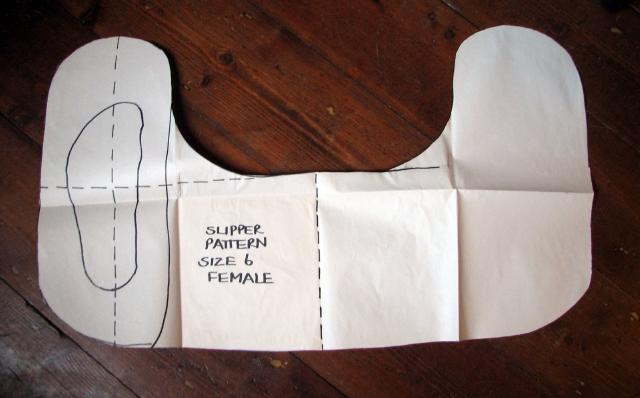
Cut it out the paper pattern, place it on the foam laminate flooring underlay and trace around it - retain paper pattern for future reference and work only with plastic pattern from now on.
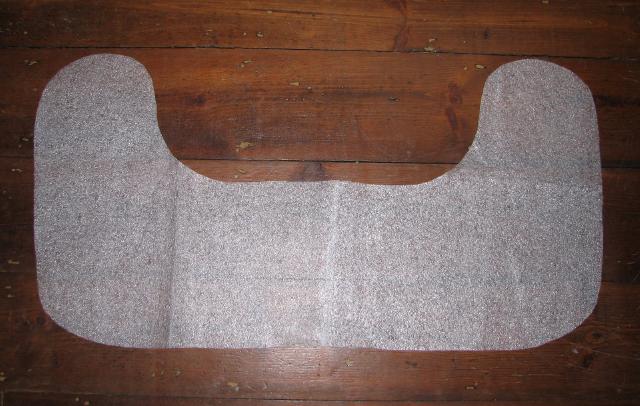
This boot is 32.5 inches long by 17.5 inches toe to heel .
Getting started
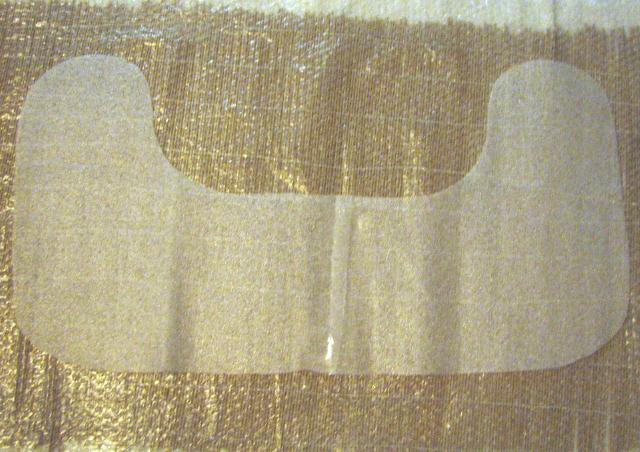
Lay out an old towel, the matchstick blind and the single sheet of bubble wrap (bubble side up) with the template on the top.
Make up a jug of cool soapy water (using the olive oil or glycerine soap). Make the solution to a "slightly slippery" consistency when you rub the liquid between your fingers.
Lay out an even fringe of fleece all around the edge of the template.
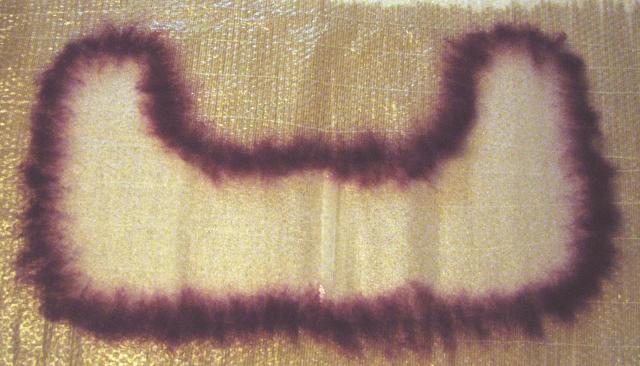
Follow this with fleece laid on a North / South alignment, just like little even "shingles" on a roof.
Repeat, only this time lay the "shingles" East / West. You now have two layers of fleece on your boot.

Wetting out
Sprinkle some of the cool soapy water over the fibre using the conditioner bottle. Working very gently from the middle outwards and using soapy hands, press the water to the edge of the pattern, being careful not to disturb the fleece.
You can use a piece of plastic to assist you here, either by laying it over the top of the fleece to secure the fibres or by using it scrunched up into a pad. Whatever works best for you really.
You will be able to feel the pattern under your fingertips; let the wool soak up the water but don't let the water soak the fringe of fibre around the edge.
The soap acts as a mild glue and changes the pH, which encourages the scales on the fibre strands to "open up". This is what we want to happen. Once you have distributed the soapy solution, cover the template with a piece of bubble wrap and quickly flip it over so that the bottom of the template is now on top.

Fold the un-wetted fringe over the edge, securing it with a bit of soapy water if necessary. Make sure that it is snug to the template edge, because if it isn't then you will end up with a felted ridge in your boot.

Repeat the laying out procedure until you have two layers of fibre on the other side of the boot.

Tidy up and wet out.
Add a new fringe of fibres.
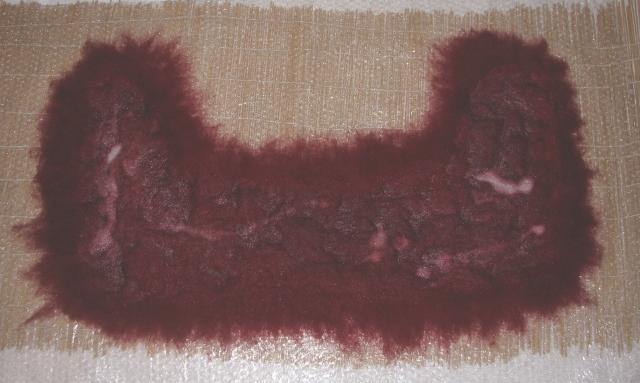
Fill in with North /South overlapping shingles, followed by East / West, just as before (I have used a different colour of wool because I want my boots to be coloured differently on the inside and outside).
Flip over and add another two layers North / South and East / West. The whole boot template is now covered in four layers of fleece.

Felting the boot
When the wool is completely wet through and tidied, cover the boot with the bubble wrap (bubbles down). Using a smidge of soapy water over the top of the whole thing, start to rub your hands over the boot package very gently.

Pay special attention to rubbing the edges of the boot and not shifting the fibres around. How long you will need to rub out will depend on the fleece you have used. It took me an hour to make sure the first side was properly felting together.
You can test to see if the fibres are interlocking by removing the top layer of bubble wrap and pinching the layers gently. When they hold together you are getting there.
What is happening?
Felting occurs when the scales on the fibre strands open up and interlock with each other. Friction, soap, warmth and pressure all encourage this process along.
Then flip the boot over and do the other side. Once both sides are done, lift the edges and rub those out one more time for luck.

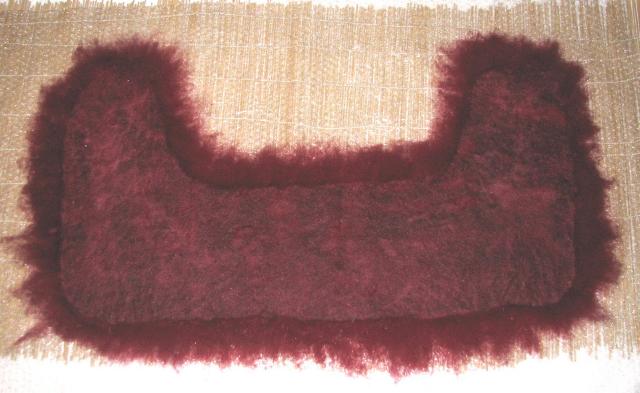
By now your boot will all hold together but will be very soft and floppy. The felt is quite fragile but you can start to add more pressure and remove the top layer of bubble wrap. Rub, rub, rub - add some more soapy solution to prevent pilling and fibre shifting as required. When it's all holding together nicely you can run the bar soap straight over the felt to help you on your way.
Now it's time to roll the package up, drain the excess water out over the sink and have a break. You might want a cup of tea now ;).
Starting to full/shrink
After your cup of tea (or something stronger) roll up the boot (minus its top layer of bubble wrap) like a sausage roll in the matchstick blind.
With your hands on top of the sausage, roll back and forth 50 times from one end. Then unroll and wrap up again from the other end (rolling another 50 times). Flip over and repeat this process until you can feel the template inside start to buckle from the felt shrinking.
Now pop the boot in the washing machine and spin out all the water. First use a slow spin, checking the boot to make sure everything is OK after that cycle, and then use the fast spin.
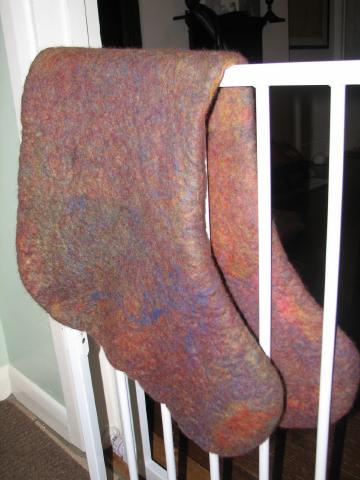
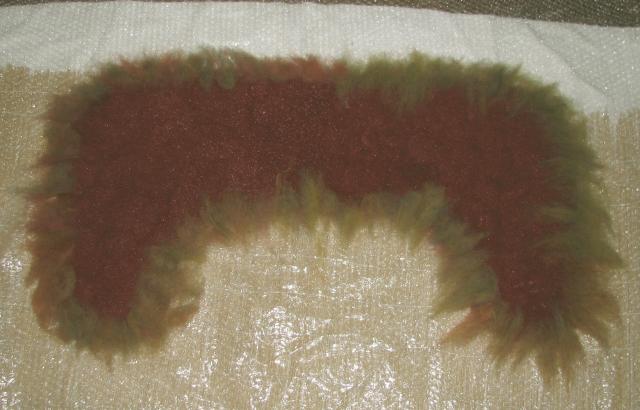
The boots will be really big and slightly crumpled (here is the boot folded in two with my foot for scale).

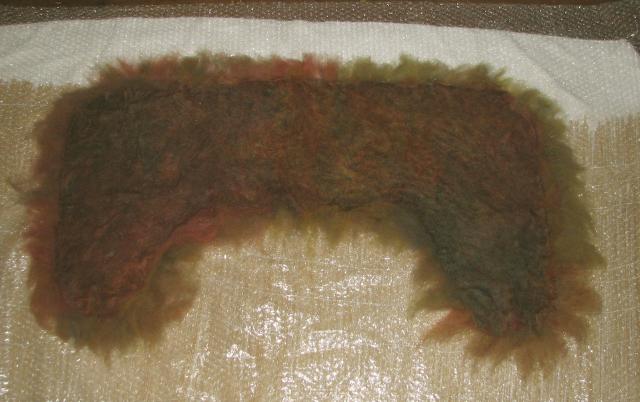
Now it's time to take a pair of scissors and cut the one boot into two! Make a small hole first and then cut carefully so as not to damage your precious template, and divide the one piece of felt into two separate boots.

Here you can see the boots cut in half, with one turned inside out to show you the Red Alpine on the one side and the blended Merino on the other. Pick which side you prefer.

Now, you need to wet them out with tepid water: grab your bar soap and start to rub out the "seam" line that may have developed. If you do not do this, you will end up with a ridge in your boot and that won't be good.
Once the boot is nice and soapy, remove the blind and just use your hands to manipulate the felt. Then it's time to decide whether to full (shrink) the boots using the washing machine or by hand.
Are you happy with your wash?
My washing machine has several settings and I'm happy with each of them - so happy that I use them several times while fulling (shrinking) boots.
You can full your boots by hand: wet them out with water as hot as you can bear, soap them up, stick them on your foot and rub against something ridged. Your knuckles will do, or an old fashioned washboard perhaps. I have been known to use ancient butter pat "hands" to give my own hands some respite! It will take a long time but you will end up with a lovely smooth, hard boot which fits your foot perfectly. This is the "proper" way to do it and it requires some patience as it takes it a long time.
Or you could be lazy and wash them on a cold wash, check them, turn them inside out, then wash again on a 30 degree hand wash with a pair of old jeans, check them again and stretch them out on your foot. Don't forget the pure soap flakes, or make some soapy gloop using olive oil soap and boiling water. Put the gloop directly in the drum before turning the washer on.
Are your boots the right size yet? If they arent, use a 40 degree wash (keep the jeans in for agitation). Turn the boots inside out each time you wash them to keep the fulling even and prevent creasing. For this pair, I then used a short wash at 60 degrees and at that point my boots came to size, so I stopped.
Now if you are one of those lucky people who can start and stop their washer on a whim, I would set the temperature to 60 degrees and check the boots at 15-minute intervals, dropping to 5-minute intervals as the boots shrink close to the size you want.
Nearly there
They look a bit sorry for themselves don't they? Don't worry, they'll be fine.

Now it is time to block them. They will be really hard to pull into shape - unless you pop them in the microwave along with a cup of water and blast for a minute on high.
They will come out hot and pliable and, as soon as you can, pull them onto your feet. Keep pulling them into a regular shape, the felt isn't fragile now!

Decide which side you like the best, turn the cuff down maybe? Trim the top if it's uneven.

Once you are happy with your boots, stuff them with plastic bags and leave them dry in a warm place while you consider if you are going to embellish them further (a bit of needle-felting maybe?). I like to buy an outdoor sole for this plain type of boot as I find it really finishes them off and gives good traction to otherwise slippery soles.
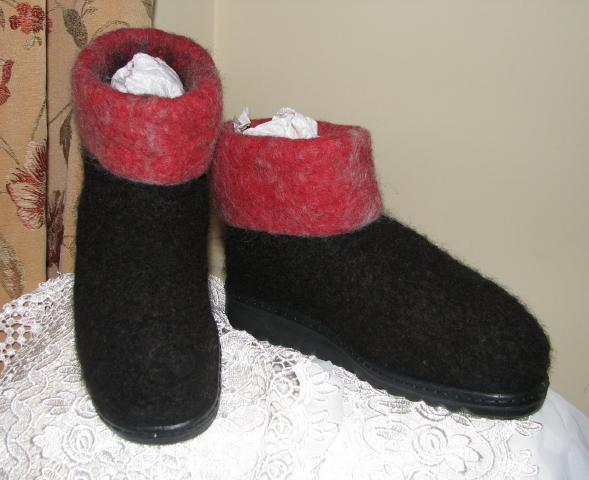
This type of sole is already punched with needle holes and is back stitched on using a thick waxed and braided thread. Alternative soles include suede (pre punched with holes or otherwise) or even some of the traction-giving fabric paint (although I haven't tried the fabric paints myself). |

