Knitting a Stash Blanket
Written by Toggle
Toggle's tips on how to use up your surplus wool.
Most knitters end up with leftovers and odd balls of yarn leftover from
other projects, or picked up because they like the colour, or can't
resist a bargain, or dyed something the wrong colour or, or, or.... OK,
lets just look at it this way. Most knitters have a load of what is
reasonably decent yarn, that they don't have a clue what to do with,
because there isn't enough of any particular yarn to do anything with.
They are also likely to have more yarn in one thickness than another.
For many of us, this is dk/aran weight.
There is however a use for this yarn, apart from gathering dust or
possibly going into the under stairs cupboard until it becomes a mouse
nest. This is a stash busting blanket.
Start by going through that stash, you know, the one that you've been
hiding in the back of the cupboard in the hope that all those strange
bits will go away or knit themselves into something great. Today, you
are going to start knitting them into something great. Get all the
dk/aran yarns into one bag.
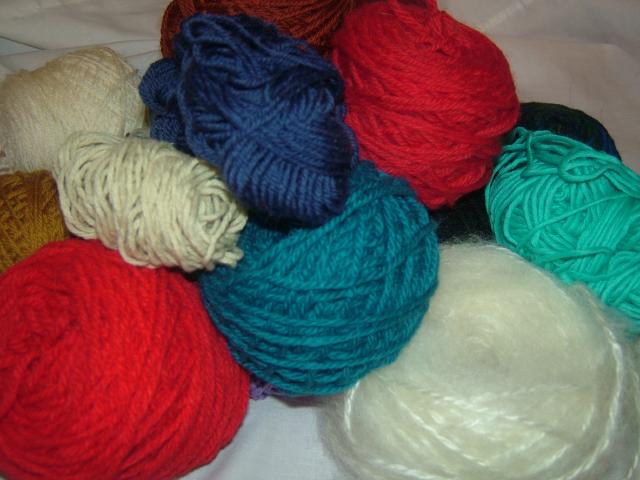
You may also want to select for fibre content, when my knitting group
did a baby blanket version, we insisted on washable yarns, you may want
to select animal fibres only for warmth, cottons a for light washable
summer blanket, remove anything itchy. Take your pick. Here's some of
mine:
>Then select the needles on which you want to knit. I would suggest
you use the needles on which you are likely to knit a jumper with the
majority of these yarns. This will give you a gauge that isn't
massively tight or lacy, just right for a blanket. What the gauge is
isn't really important, just that the fabric you make feels nice. I
used a pair of 4mm needles.
Then start knitting:
Cast on 3 stitches.
Row A: S1, K to last stitch, kfb
repeat row A until the edges of your triangle are the length you want your squares to be. I used 15 cm/6 inches
row B: S1, K to last 2 stitches, k2tog.
Repeat row B until 3 stitches remain on needle.
Sl, k2tog, psso.
Cut yarn and run tail through loop.
S1: slip 1
K: knit
kfb: knit a stitch into the front and back loops, making an extra stitch
K2tog: knit 2 stitches together
psso: pass slipped stitch over
You are then left with a garter stitch square.
You now need to vary the design by changing colours every few rows.
The
limit on this is your imagination. Simply stop knitting one colour at
the end of a row and start knitting the next. If you are doing stripes,you don't have to cut the yarns every time, you just have to carry them up the sides by wrapping so you don't get long loops, make sure you don't pull too tight either.
Here's some squares I made earlier.

When you have the number of squares you want, sew them together, I
prefer to leave tails on my cast on and off long enough to use them for the sewing up, or you can use a single contrasting yarn. Sew in all the remaining yarn tails and if you wish, add a knitted or crochet border.
If you have any questions or suggestions about this article please raise them on our forum. |

