How to Make A Mosaic House Plaque
Written by Greenfoot
Luis Laso Casas, better known to Downsizer members as Greenfoot, provides a step-by-step guide to designing and making a mosaic house plaque using hand-cut natural stone tesserae in the indirect style.

Materials needed:
Thin plain paper
Ruler
Pen
Natural stone and/or marble
Goggles
Hammer and anvil
Snippers
Wood glue
Tweezers
Sand and cement mixture
Metal frame
Chicken wire or similar
Hanging hook
Design
The house plaque will be made in the style of a Roman mosaic also known as Opus Tessellatum (work done with tesserae). To make this mosaic we will use the indirect method, which requires gluing the tesserae upside-down; in effect we will be working in reverse and will only see the result when the plaque is finished.
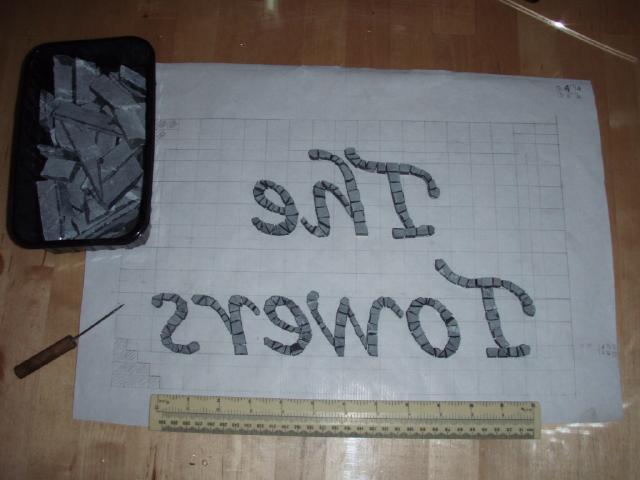
This design is for a house plaque based on a 1 cm grid to which we will glue the tesserae or stone cubes, each measuring between 8 mm2 and 10 mm2. The lettering is hand drawn but can be adapted from a computer printout. When you trace your design onto paper, make sure that you trace the reverse of your design, as we will be working in the indirect method as you can see from the photos. You can also add a motif and/or border.
I suggest that you use a simple style of letters for your first project. It is easier to do a mosaic without curves in the design, hence the advice to use simple lettering for your first mosaic. An example can be seen at the top of this article.

Simple house plaque design with a number and motif.
For this article I will use a more flamboyant font that can be easily mastered with practice.
Sourcing materials
When choosing the types of natural stone that we want to use to make the tesserae we need to take into account the hardness and the characteristics of the stone. We will aim to use stone that we can easily cut into cubes with a hammer and anvil. I use an old piece of metal H-beam as my anvil. Limestone and marble are a good choice. Granite tends to be very brittle when we cut such small tesserae.
Stone masons are a good source of natural stone for mosaic-making. You can ask permission to take some of their waste material or ask for strips to be cut for you mechanically at low cost. When I purchase pre-cut strips, I always ask for them to be cut 18 mm and 27 mm wide. The photograph below shows a box of pre-cut strips of black marble measuring 18 mm wide by 5 mm thick and the start of the mosaic.
Method
Mastering the cutting process to make the tesserae is an essential aspect of Roman mosaic-making; it is not easy and takes a lot of practice. The quality of the tesserae we cut and use will influence the beauty and aesthetic value of our finished mosaic.
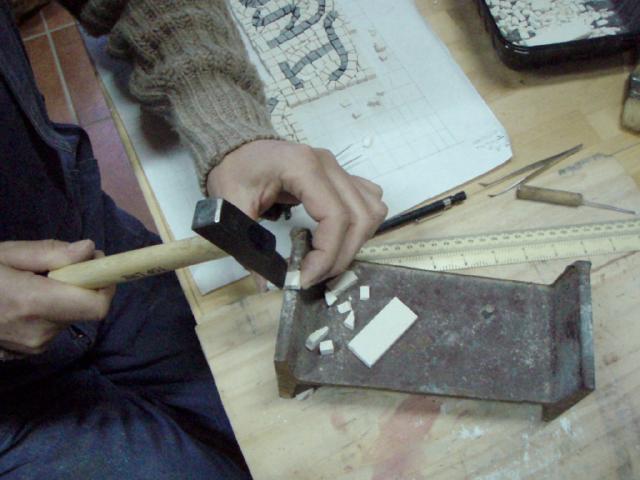
I would like to mention some health and safety issues. Goggles should be worn while cutting stone, care should be taken when cutting the tesserae using snippers or hammer and gloves should be worn when handling cement. Handling stone will dry your hands and using moisturising cream may not be a bad idea.
Using the snippers or hammer and anvil cut the stone to make the tesserae in the required size and shape.
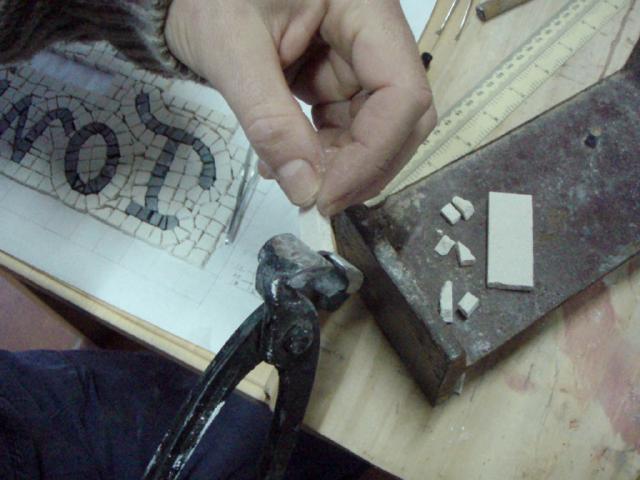
Start placing the tesserae onto the design, fixing them individually in place with a small dab of glue, good side down, until you have completed the design. Remember you are seeing the reverse of your design.

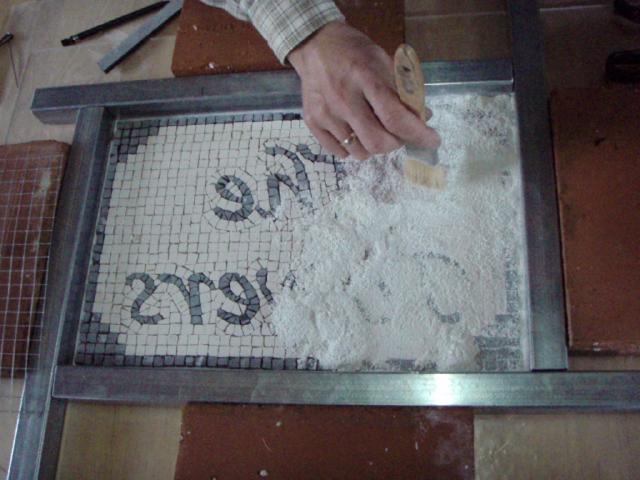
When the mosaic is complete, a galvanised metal frame is placed and fixed around the mosaic plaque, leaving a 5 mm border. Dry white cement powder is gently brushed between the tesserae. A wire mesh cut to size is added for strength and to attach the chosen hanging device. In this instance I used a length of bicycle brake cable. A mortar mix of 1 part white cement and 3 parts fine sand is poured carefully into the mould so that we do not dislodge the tesserae or frame. It is important to get the correct consistency and only experience will really help you here; imagine a thick custard consistency. It is filled to the required depth, 3 cm in this case, and smoothed gently.


Leave the mosaic until fully hardened before you remove the frame and turn the mosaic. Next, remove the paper and carefully wash away the glue from the tesserae to reveal your mosaic for the first time - always a very exciting moment. Some grouting may be required if there are gaps - use a thin white cement and water mix. Leave the mosaic to cure wrapped in plastic for 4 weeks. Once out of the plastic, leave to dry in a cool place. You can apply a clear wax coating to enhance the natural colours of the stone. Hang, stand back and enjoy it.

The completed house plaque in situ
The next images show two different styles of Roman mosaic or opus tessellatum. In the first one the tesserae vary in size and are cut in a less regular way, as you can see from the numbers and the pig's head and body. This one was made by a friend while visiting last year. She has no experience of mosaic making but managed very well with some instruction. The last image shows a garden or terrace table measuring 1 m2, in which the tesserae are cut in a more regular manner. It also incorporates a beautiful central flower and 4 Solomon knots surrounded by a twisting rope.

Small house plaque made by a first-timer

Mosaic table
Like any other craft it takes time to learn and master the techniques and tricks of the trade. Start small and simple both in design and ambition. I was self-taught and never stop learning. More of my Roman style and pebble mosaics can be seen in my blog, which is dedicated to my love of traditional crafts. Although it is written in Spanish, you can see the different images and there are some links to photo galleries. |

