Making Butter
Written by woodprite
Making butter is easy and very satisfying!
In this world of additives and preservatives what could be more satisfying than homemade butter containing just two ingredients:
cream and a pinch of salt? Woodsprite shows you how...
What is Butter?
Butter is a dairy product made by churning the fat from milk until it
solidifies. In the UK most butter is made from cow’s milk but elsewhere
goats, sheep and even mares milk is used. Butter was known to be made
in 2000 B.C. but it was used less as a food than as an ointment,
medicine or ‘illuminating’ oil. Originally it was churned in skin
pouches thrown back and forth or swung over the back of a trotting
horse. Later various hand churns were designed including the archetypal
end over end churn used from the Tudor until the Victorian period.
How is it made?
Agitating cream breaks the fat droplet membranes and allows the fat
molecules to come together (coalesce). When enough fat comes together a
phase inversion takes place. The fat becomes the continuous phase and
the water, the discontinuous phase. When the fat is a solid fat, the
resulting material is butter.
Butter is over 80% fats with water making up the rest of the system. The remaining 20% is buttermilk.
STEP BY STEP
There are many ways of making butter but for convenience and speed nothing beats a food mixer.

Start the mixer with the whisk attachment on low speed (to avoid
splatter) and progress to medium speed as the liquid begins to thicken.
At this stage, the cream drips in long thick strings. Just past the
stiff peak stage the cream begins to crinkle up. This is when the cream
is about to seize and become butter. The cream also takes on a very
pale yellow colour.
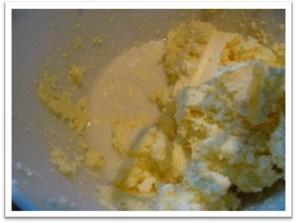
A few seconds later, the mixer should churn the cream into
butter. This happens quickly - the cream suddenly seizes and buttermilk
floods out, while pellets of yellow butter form. You'll want to slow
down your mixer at this point to prevent splashing the buttermilk all
over your kitchen.
The amount of liquid that is expelled as the butter begins to mash
together into a larger lump is considerable. At this point, it's best
to remove the buttermilk (you can reserve it for use in baking recipes
- use as if it was whole milk, not buttermilk) and keep mixing a bit
longer. The buttermilk is only about as acidic as regular milk because
we did not sour the cream before churning.
You can approximate store bought buttermilk (which is actually
cultured buttermilk) by adding a little lemon juice, but it won't be
quite the same. Also, our butter milk has a little more fat than the 1%
fat cultured buttermilk sold in the supermarket.
The butter should be washed to remove as much of the butter milk as
possible. This can be done by placing the butter in a colander and
rinsing with cold water. Wash it until the water runs clear through the
butter. Not washing will result in butter that may go rancid because of
the buttermilk.

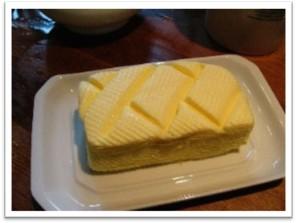
Using scotch hands or butter pats on a wet wooden board, you can
now pat your butter into shape. Traditionally patterns were added to
the top of a stick of butter to enable the customer to distinguish
which farm the butter had come from. Farmer’s wives would come into
town on market day and sell their butter under the ‘Butter Cross’.

Additional ingredients can be added to make new kinds of butter.
Salted butter can be made by adding 1/4 teaspoon table salt to every 4
ounces (115 g) of butter at the patting stage. It is advisable to add
salt to your butter to help preserve it a little longer. Other popular
additions are herbs and garlic. Use about 1 clove of garlic, finely
minced, for every 4 ounces of butter (or more if you like garlic). For
herbed butter, I use about 2 Tbs. of dried herbs for every 4 ounces of
butter.
The butter that is made this way is ‘green’ butter. By this I mean
that the cream we used was fresh and not soured. The resulting butter
will taste fresh and light.
Homemade butter will freeze for about 3 months. This isn’t as long
as store bought butter but it has none of the stabilisers and
preservatives that are in store bought.
 |

